This is probably the first time you come in to contact with a FOX module. First thing you do when you start a new programming language is make a program that prints out “Hello world”. So we will do something similar by printing "Order Module" on the screen.
A FIRST GLANCE
To begin, you will need to retrieve a module called ORDERMODULE.xml from PVCS Version Manager. Open PVCS and login using the username and password that have been given to you. Navigate down the explorer to “DTI OG Applications\Training\FOX”, right-click on ORDERMODULE.xml and select “Get”. In the new prompt that appears, click on OK. This will create a local copy of the file on your computer, usually found in “C:\pvcs\Training\Fox”.
You should now make a personal copy for editing in subsequent worksheets. Create a new folder called “FOX Training” in the “My Documents” folder and copy and paste the file to this location. Rename the file “XX_ORDERMODULE” (where XX are your initials). Finally, right-click on the file, go to Properties and un-tick the Read-only box.
SCHEMA
There is a FOX module schema that we use to help ensure correct syntax while editing in XMLSPY. In fact, XMLSPY has a number of entry helpers that uses the schema.
The first thing we will do is Get the schema from PVCS. In the folder structure, navigate to “DDTI OG Applications\Fox\source\altova_xmlspy\schema”, right-click on the “schema” folder and select “Get…”. In the new prompt that appears, click on OK. This will create a local copy of the folder and its files on your computer, usually found in “C:\pvcs\Fox\source\altova_xmlspy\schema”. When the folder finishes downloading, click on OK to close the status prompt. You now have local copies of the different schemas involved in making a FOX module.
SCHEMA IN XML SPY
NB: If any tabs referred to below are not visible in XMLSPY, goto “Window” on the toolbar to turn them on again.
We will now set up XMLSPY to use this schema for a project folder.
Open XMLSPY. On the left hand side there should be a Project tab. Select Project > New Project. This will start a new project named “New Project” in the Project tab. Right-click on the New Project and select “Add External Folder”. Browse to the location of your “FOX Training” folder and click on OK. Right-click on the added folder in the Project tab and select “Properties”. In the Validation section of the window, check the tick-box and click Browse. Select the file “C:\pvcswork\Fox\source\altova_xmlspy\schema\fox_schema.xsd” and click OK. Click OK again to close the Properties window. You have now set up a project folder that will be kept up-to-date whenever new files are added to the directory (right-clicking on the folder and selecting “Refresh External Folder” to manually check) and will be validated using the FOX module schema. This comes in handy in the future, when you’ll regularly “Get” or “Check Out” new files from PVCS.
You will find your XX_ORDERMODULE.xml module in the folder added to the Project tab. Double-click to open it. Switch to Text view, and navigate through the module. The entry helpers on the right of the screen will show you what you are able to enter at any specific level of the XML document, while the Info tab gives details on what each element is. You can turn these off to give you more room to view the module once you are comfortable with using FOX.
Finally, in order to use a FOX module, all references to the file name must be the same. Find the element <fm:name> (CTRL+F brings up the Find function) and change the text from “ORDERMODULE” to “XX_ORDERMODULE” (where XX are your initials), so it matches the filename. It is good practice to always ensure these are the same.
Save your changes and save the project (Project > Save Project) in your FOX Training folder.
LOADING A MODULE ONTO THE DATABASE USING TOAD
Open Toad and log onto the DEV8 database using the schema ENVMGR and the password “dev8”.
Open the Editor Window and write an INSERT statement to insert the record for your new module into the fox_components_env table. By default, this is the table that the FOX engine fetches its modules from. To insert a new module (and thus new row in this table) you will need to run a SQL insert statement:
INSERT INTO envmgr.fox_components_env (name, type)
VALUES('module_name', ‘module’)
Where module_name is the name of your module in single quotes (excluding the ‘.xml’).
Now, open a schema browser window, locate the newly inserted record. Double-click on the cell of the DATA column for your row. This will open the Popup Editor.
Copy and paste all the text from your module in XMLSPY into the Popup Editor. Press the tick symbol and then close the Popup Editor window. Confirm the changes by pressing the Commit button (![]() ).
).
You have now stored a module in the database where FOX can find it.
RUNNING A MODULE USING THE MODULE LAUNCHER
NB: You can use any Internet Browser you prefer; however, FOX only supports Internet Explorer 5.5 and 6. As such, if you do use a different browser, make sure that any modules you work on also work in IE.
Open the URL http://edu-app1/engdev8/fox/dev8/MODLAUNCH and add it to your favourites.
In the Module drop-down list locate your XX_ORDERMODULE module and select it. In the Entry Theme drop-down list, select the “new” entry theme and then click Launch & Flush!
The module launcher imitates the way different modules would call each other in a live system. It allows you to create data structures that are passed to the module and save them for future use. This comes in handy for testing a module before implementing it into the Portal.
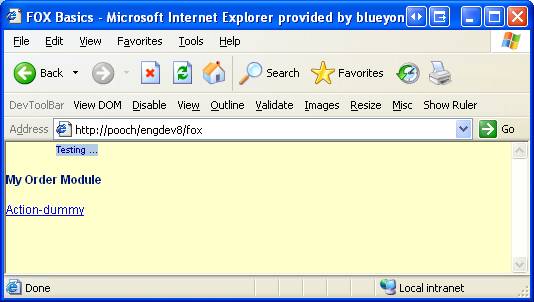
ORDER MODULE ON THE SCREEN
What you see is the simplest of modules, a simple piece of text and a button. There are different levels at which the presentation – what you see on the screen – can be specified. In our simple module the presentation is set on a modular level.
Swap to XML Spy and in Grid View, open Annotation/Appinfo/Module/Presentation/Set-page as well as Annotation/Appinfo/Module/State-list. This will look as follows:
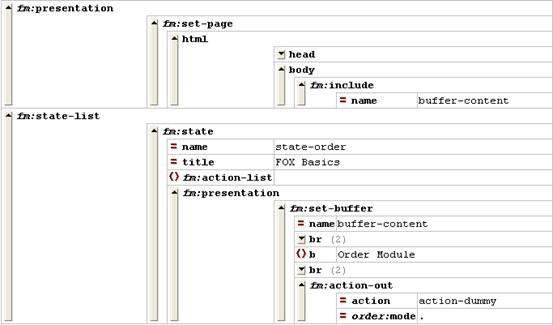
This set-page is the most fundamental presentation layer in the module. We have added a HTML element that has a BODY sub-element that displays the BUFFER buffer-content. The buffer contains a TEXT element with the “Order Module” text and an Action-out element (detailed in subsequent worksheets).
Now change the text “Order Module" to “My Order Module”. Save the XML document and switch back to the Internet Explorer window. Click the “Action-dummy” button to reload the page.
As you notice nothing happened. This is because we have not committed the changes in the XML document to the database. Go back to XML Spy and copy all the code into the record you created in Toad (as detailed earlier). Commit the changes to the database.
Swap back to the Internet Explorer window and press the “Action-dummy” button again. As you notice nothing happened this time either. This is because FOX caches modules in memory and changes made to modules in the database will not be seen until the cache is cleared. This is done by flushing FOX.
DEVELOPER SYSTEM MENU
If you look at the Internet Explorer window showing your Order Module application, you can see the word “Testing…”. If you click it the FOX developer system menu opens. From there you can inspect the different DOMs (detailed in subsequent worksheets) and flush the cache. Just click Flush and a separate window opens. Close it when it has loaded.
NB: When working on a FOX module and you are flushing regularly, it is easier to minimize the separate window that opens, since it will only open once.
Now, go back to your Order Module window and click the “Action-dummy” button again. You notice that this time your changes have gone through.
SETTING UP CLOBBER
Gary has developed a piece of software called Clobber. It is a Java application that you set up on your machine to automatically update module data in the database.
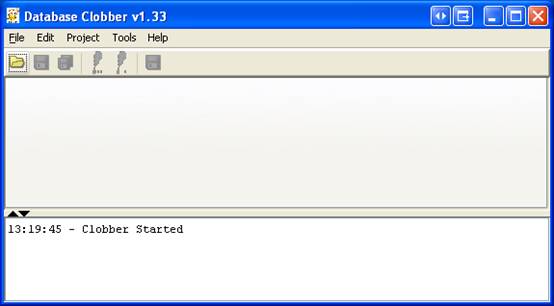
If you do not already have a shortcut icon on your desktop for Clobber, go to “\\jaguar\ShareArea\clobber2”. Copy and paste “Shortcut to DatabaseClobber.bat” to your desktop and rename it “Clobber”. Double click the icon to open Clobber:
![]()
Your window will look something like this:
Click on Project > New Project then Edit > Databases menu.
Click New… to add a new database reference and enter the following details:

Where password is “dev8” and JDBC URI is as follows:
jdbc:oracle:thin:@edu-db1:1521:dev8
Click on Test Connection to make sure the details are correct. If an error occurs, ask for assistance.
Click OK on the opened windows till you get to the main screen and then click on Edit > Database LOB Resources.
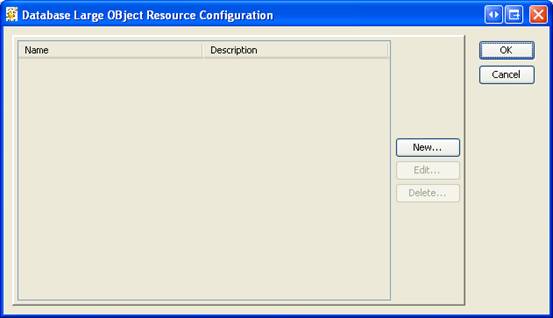
Click New… and enter the following details:
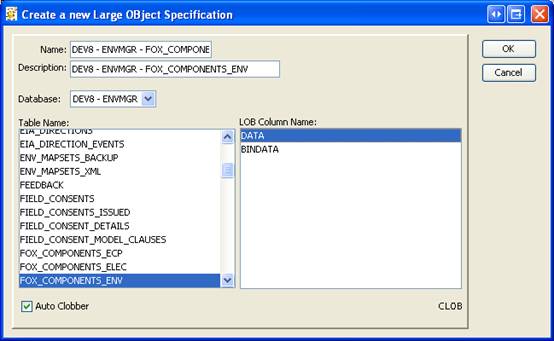
Where the Name is the same as the Description.
Click OK on the opened windows till you get to the main screen and then click on Edit > Clobber Resources.
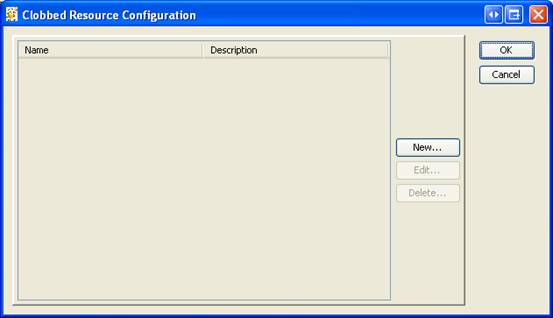
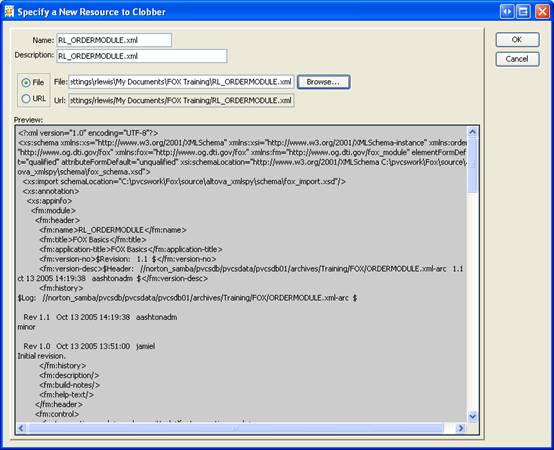
Click New… then click the Browse… button. Find and open your copy of the XX_ORDERMODULE.xml file.
Click OK on the opened windows till you get back to the main screen.
We have now given Clobber all the details it needs to successfully copy your files into the database. It does this by checking the file date against a record it keeps of when the file was last copied to the database (clobbered).
The last thing we have to do is tell Clobber to clob the file. Go to Edit > Clobbers…
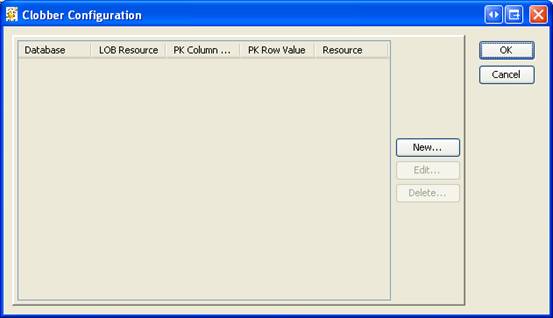
Click New… and enter the following details:
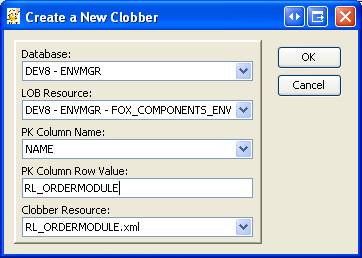
Remember to substitute in your own initials in XX_ORDERMODULE. For the examples, I have used my own initials.
Save the project by going to Project > Save Project. Save it in the default location and name it “FOX Training.
NB: When a module is added to Clobber, it is automatically clobbered. At the time of writing, in the latest version of Clobber (v1.33), you must have already created a row for your module in the database before being able to add it into Clobber.
USING CLOBBER
We are now ready to make changes to our module and see the changes take immediate effect.
Swap back to your XML Spy window and change the text, “My Order Module”, to “Hello Foxy Lady!”. Click Save in XML Spy.
Swap back to Clobber and you should see a green tick next to the clobbed row. This indicates that your file has been copied to the database. If it has not worked, a red cross will appear instead. Ask for assistance if you have any problems.
![]()
Go back to your Internet Explorer window, flush the module and press the ‘Action-dummy’ button.